
Business Topics
Discover how switching to battery-powered hardscape equipment can enhance sustainability, reduce operating costs, and boost your business performance.
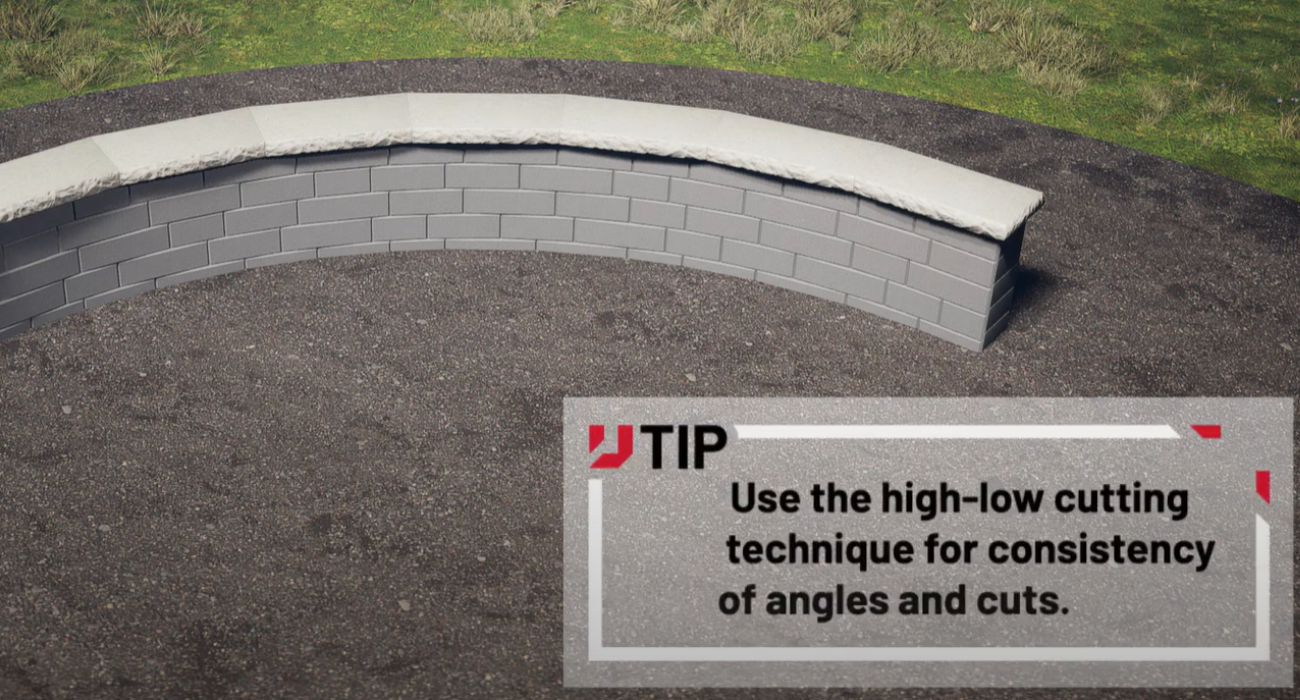
There’s something deeply satisfying about stepping back to admire a freshly built retaining wall. But when the design includes a slight curve, cutting coping to fit the radius can be tricky. The cuts must be precise, and let’s face it—time is money.
Over the years, we’ve developed a proven technique for cutting coping that saves time and reduces waste on your jobsite. In this guide, we’ll walk you through the process of cutting coping to fit both open and tight curves.
Before you start cutting, it’s important to ensure you have everything you need to do the job safely and efficiently. Here are the tools we recommend:

Now that you’ve gathered the tools you’ll need, let’s walk through the steps for cutting 24” coping along a wall with a radius greater than 8’:
Step 1: Start by positioning your Unilock coping along the curve of the wall, leaving about a 22” gap between each unit.
Step 2: Place additional coping units over the gaps, overlapping the bottom units by approximately 1” on each side. Use your measuring tape to double-check the overlap and ensure the edges of both units are flush.
Step 3: Use your multi-angle measuring tool to mark your cut lines 1” in from both ends of the top coping unit.
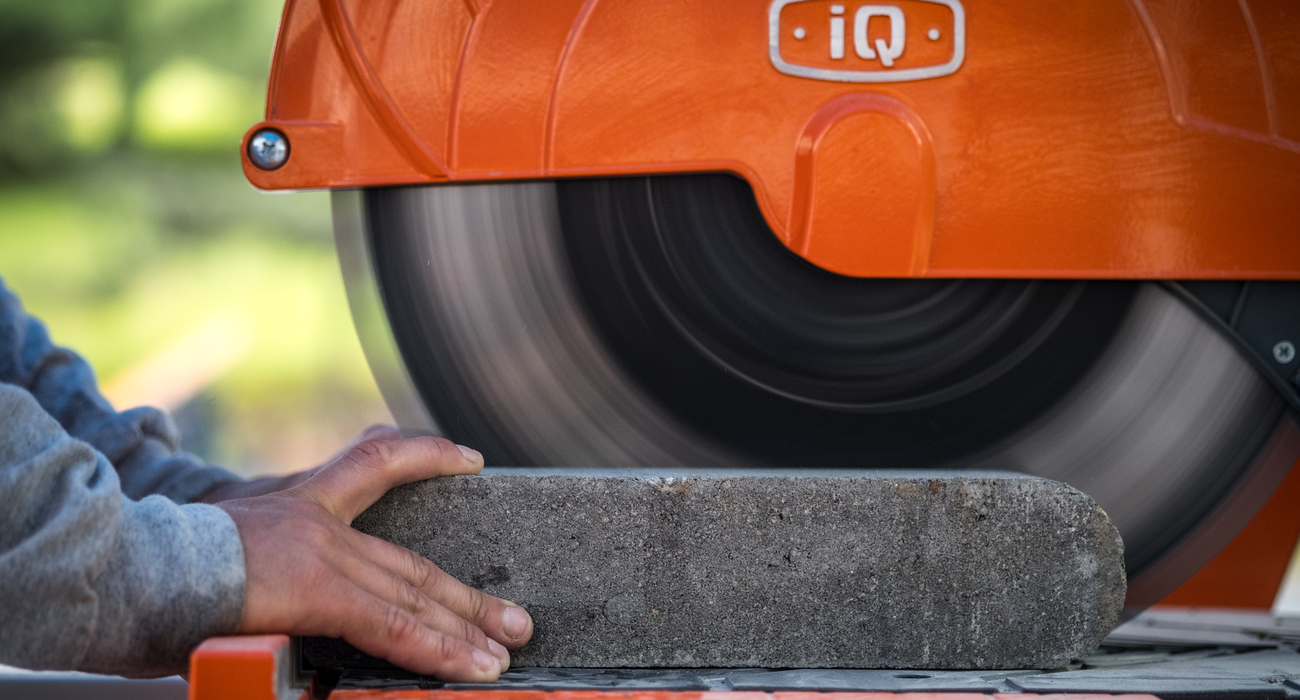
Step 4: U-Tip: Using a 14” circular saw, score both the front and back of the coping along the marked lines before cutting through the middle. This will help prevent chipping when making your final cut. Your saw should pass about 5” down into the bottom coping unit, but don’t worry – that’s exactly what you want.
Step 5: Use the wedges cut from the top coping piece to prop up the bottom unit. This will allow you to complete the cut without penetrating the wall block underneath.
Step 6: Repeat the steps until you’ve cut each coping piece to fit the curve of your wall.
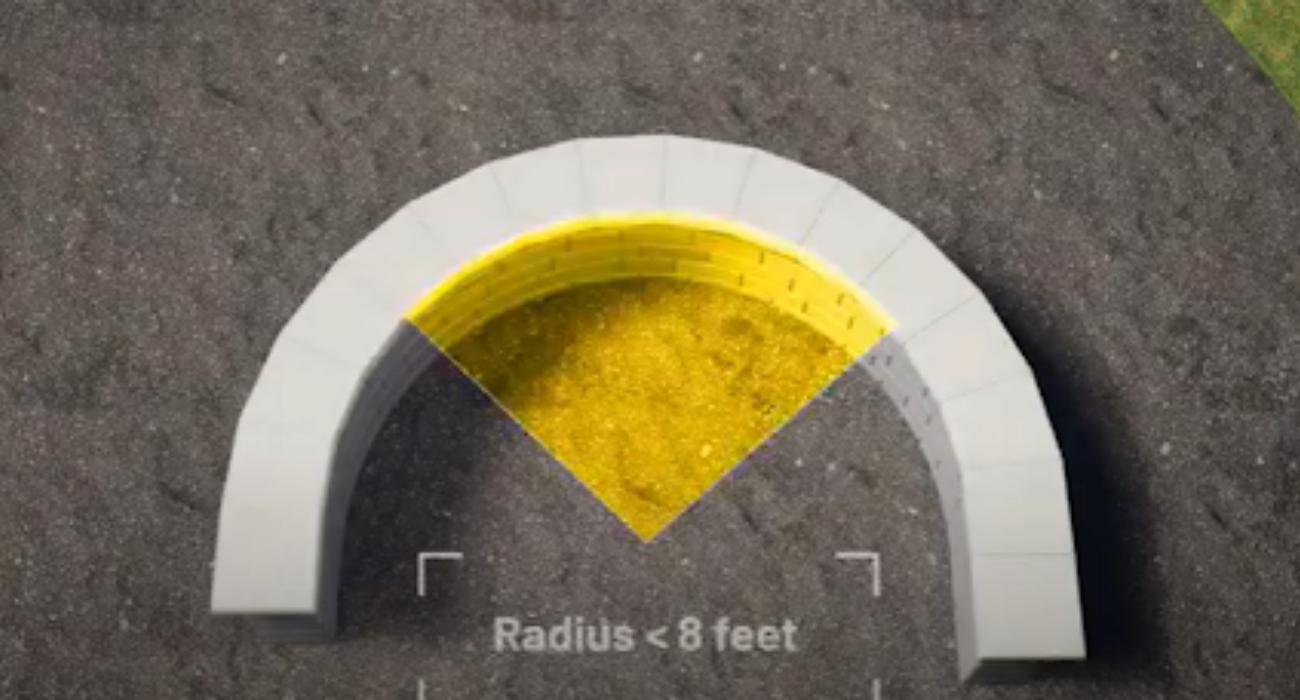
When working with a wall radius less than 8’, many contractors tend to cut 24” coping units in half and then trim them down on both ends—resulting in a total of five cuts. With our method, you can achieve the same level of precision in just three cuts. Here’s how to cut coping to fit a tight curve:
Step 1: Start by marking the center point on your Unilock coping unit.
Step 2: Align the coping with the wall, ensuring it is flush against the inside curve. Mark Point A at the outside edge of the unit and Point B at the center mark you just made.
Step 3: Position your level at the center point, angling it toward the center of the wall’s radius. Use this alignment to mark your first cut line (Cut Line #1).
Step 4: Move to the left outer edge of the coping and place your level parallel to the right edge of the adjacent unit. Mark your second cut line (Cut Line #2) using the level as a straight edge.
Step 5: Now, take your circular saw and make the first cut along Cut Line #1. This will divide the coping into two pieces—set the second piece aside for later.
Step 6: Make your second cut along Cut Line #2 to shape the first coping piece.
Step 7: Line your first cut piece along the wall, making sure to leave a 1½” overhang on both sides of the wall.
Step 8: Take the second piece you set aside earlier and place it next to the first, rotating it slightly to match the 1½” overhang. Then, position your level parallel to the edge of the first coping piece to mark your third and final cut line (Cut Line #3) along the uncut edge.
Step 9: Cut along Cut Line #3 and place the finished coping piece back on the wall.
Step 10: Repeat these steps until all your pieces fit along the curve.
At Unilock, we understand that techniques like these aren’t developed in a lab—they’re the result of real-world trial and error. Our Hardscape Education Center is a reflection of those experiences, offering hundreds of how-to guides, videos, and expert tips to help you elevate your installations. If you ever run into a challenge or need a second opinion, your local Territory Manager is just a phone call away. They’re always ready to roll up their sleeves and get their boots dirty to help you achieve the best results.
To see this cutting technique in action, check out our step-by-step tutorial on cutting coping for open and tight curves on our YouTube channel.
Contact [email protected] or please fill out the form below with details about the issue.
Veuillez appeler le 1-800-Unilock ou contacter l'un de nos responsables de territoire.


